YOUR FIRST STEPS
More time for learning.
Less to keep track of.
Homeschool Assistant helps you organize state guidance, attendance, testing, reminders, and documents on your iPhone. Your family records stay in the app’s protected local storage.
New to Homeschool Assistant?
Have your state, homeschool pathway, school-year dates, and student details ready. You can add records as you go.
Start setupThis guide covers the iPhone testing build. The app is not yet publicly available. Screen wording and availability may change as testing continues. Examples use fictional information.
Four words you’ll see in the app
- Pathway
- The way your homeschool operates under your selected state information. It determines which requirements and record categories appear.
- Requirement
- An item your state’s official sources list for your pathway, shown in the State Guide with a label, a date, and supporting links.
- Record
- A photo or file, or a note that you keep the needed record outside the app.
- Projected attendance
- A full-school-year estimate using future weekdays and your saved days off. It is not actual attendance.
The app is an organization tool. It does not provide legal or medical advice, decide whether you comply with a law, or file anything for you. Confirm current requirements with official state or local sources.
Find your way around
Five tabs run along the bottom of the screen:
- Today shows the Records Checklist for your school year: what you’ve saved and what’s still empty.
- State Guide shows what your state’s official sources list for your pathway.
- Attendance holds reminders, days off and corrections, and individual attendance reports.
- Records stores documents. Switch between Records and Testing at the top.
- More opens Homeschool Status, Setup, Links, and Settings.
Homeschool Assistant follows your iPhone’s appearance, text size, and contrast settings.
Set up your family
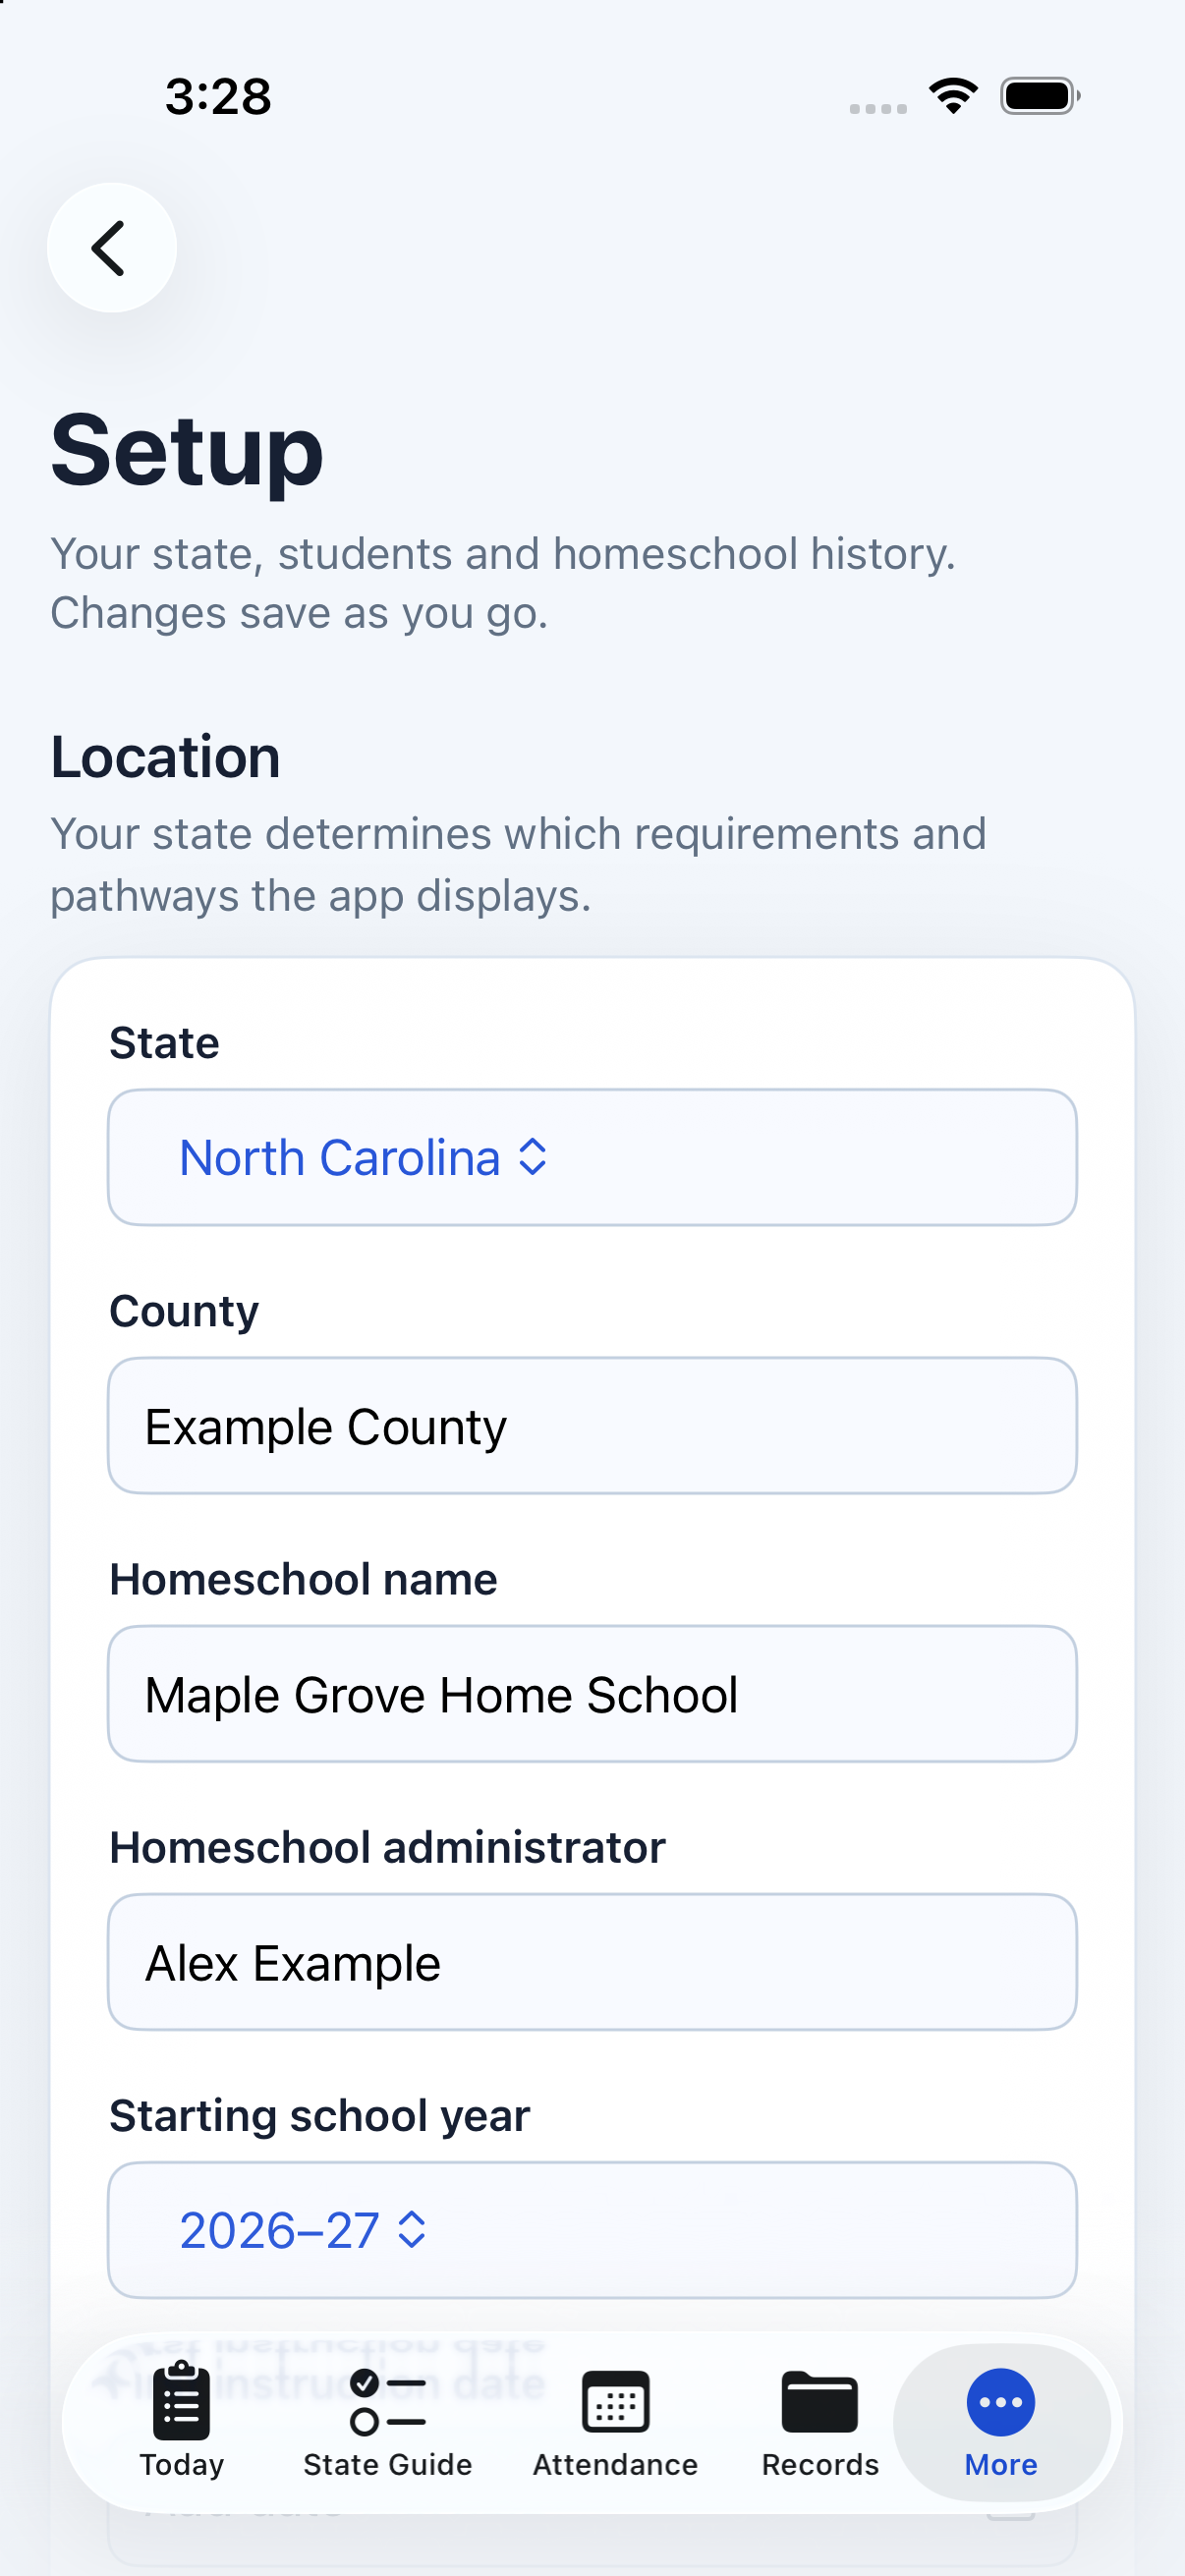
The first time you open the app, a short setup walks you through each step. Select Next to move on and Back to return. You can change any of it later in More → Setup; changes save as you go.
-
1
Choose where you homeschool.
Choose your State. Enter your county, homeschool name, administrator, starting school year, and first and last instruction dates.
-
2
Choose how you will homeschool.
If your state has more than one pathway, select the one that applies to your family. This choice determines the requirements and record categories the app displays.
-
3
Add students.
Enter each student’s name and grade, and select Add Student for each additional student. Date of birth is optional. Attendance, testing, and some records are kept separately for each student.
-
4
Answer displayed student questions.
If Student-specific requirements appears, answer only the Yes or No questions shown. Do not enter diagnosis details.
-
5
Review the homeschool history.
Select New Homeschool, Current, or Previously Operated, then select Finish. The app opens Today.
Enlarge screenshot
Instruction dates affect attendance
On weekdays inside the first and last instruction dates, the app assumes instruction occurred unless you record an exception or correction in Attendance. The last date must be on or after the first date.
Read the State Guide and record official actions
Open the State Guide tab. It shows what your state’s official sources list for your pathway, in plain language, with the date the guide was last reviewed and links to supporting sources. A one-line count shows how many items were checked against official text. Some items may say Listed as Not Required in Current Research. If an item says Needs Confirmation or Depends on Your Program, check current official guidance before relying on it.
-
1
Review the requirement.
Select an item to open its details: what it asks for, who handles it, when it applies, and links to the supporting source. Open the source when you need to confirm current details.
-
2
Open More → Homeschool Status when an official action is listed.
Use Open Official State Guidance or the official filing link. Complete any notice, registration, renewal, or other action with the designated authority outside the app.
-
3
Record the result.
In Record the Result, add dates, official school or program name, school ID, and a Registration or Notification Record photo or file when those details apply. Choose Kept outside this app when you safely retain the record elsewhere.
Enlarge screenshot
The four labels
Every item in the State Guide shows one label, as a symbol plus words:
- Checked against official text means we compared the item with an exact quote from the official page. Open the item to read the quote and the date it was checked.
- From an official source means the item is summarized from a linked official page. Open the page to confirm the details.
- Check your state’s official page means official sources didn’t settle the item, or it depends on your program.
- Not listed by official sources means the official sources reviewed don’t list the item for your pathway.
If something looks wrong, use Report an issue with this item. It opens an email that includes only the state, pathway, and item, never your family’s records.
Annual reminders appear only when the selected pathway includes a recurring action. A reminder is a prompt, not proof that a filing was completed.
Keep attendance for each student
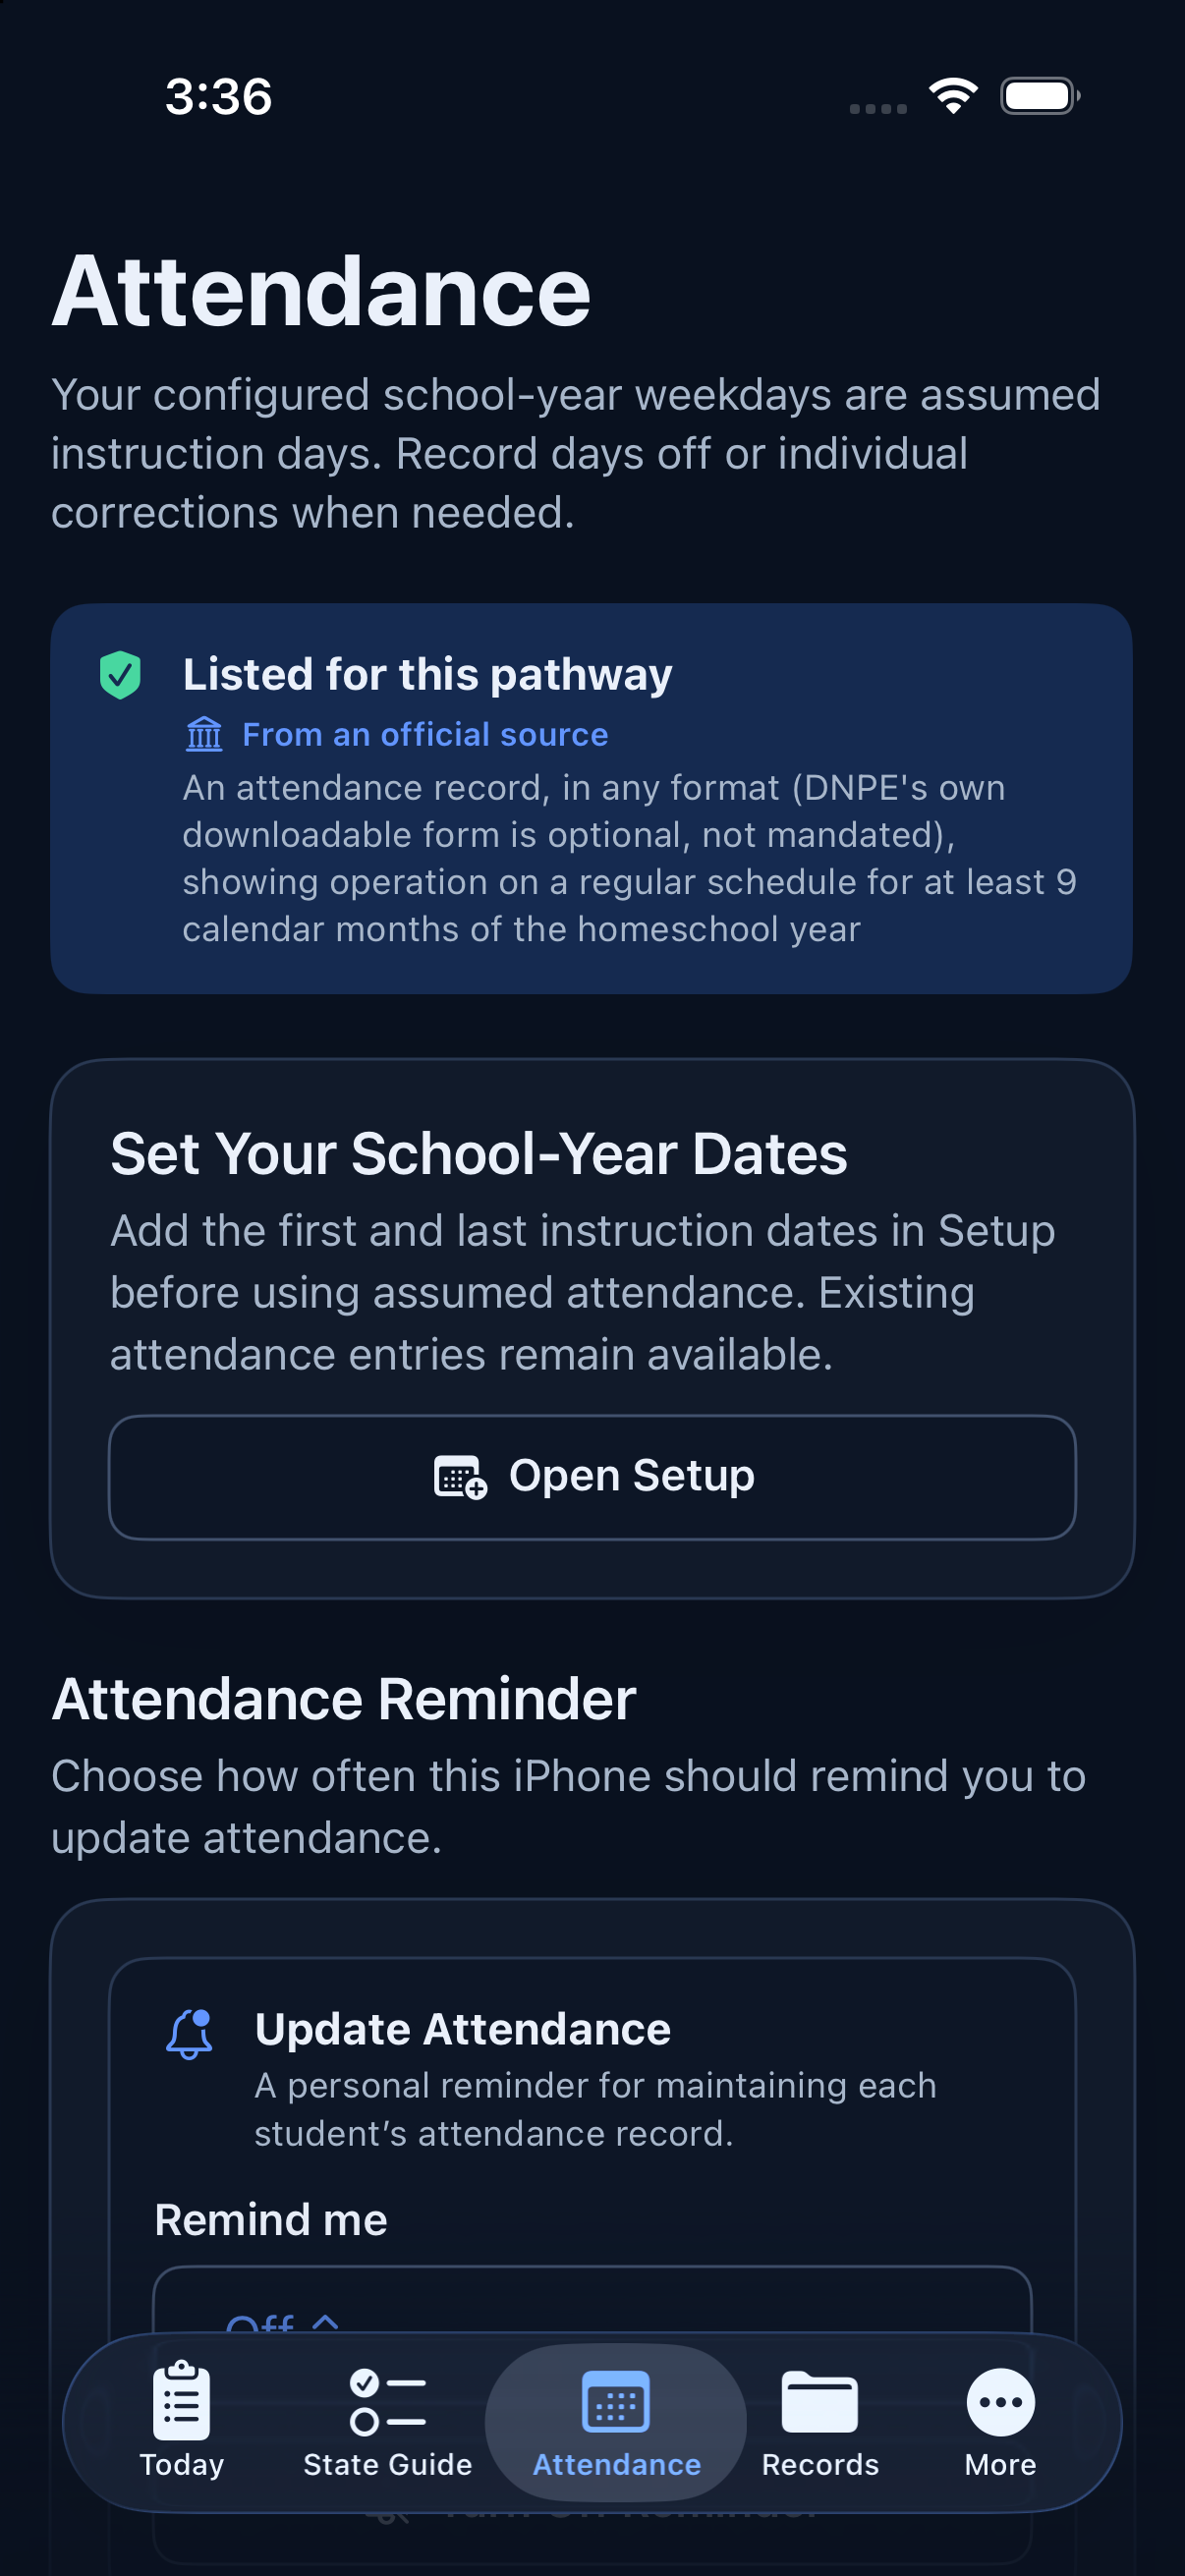
Open the Attendance tab. Set first and last instruction dates in Setup first. The app treats weekdays in that range as instruction days, then lets you record days off and corrections.
-
1
Go to Attendance Exceptions and Corrections.
Select one or more students, choose the date range, and choose Monday through Friday or Every day in range.
-
2
Choose the change.
Under Mark Selected Days As, choose Instruction Days or Day Off.
-
3
Review and confirm.
Select Review Date-Range Change, check the result, and select Confirm change. If your pathway mentions hours, the app also shows Instruction Hours per Day.
Actual and projected reports
In Individual Record, choose a student and report type.
- Actual through today counts attendance only through today.
- Projected full school year uses the full configured date range, including future assumed weekdays and saved future days off.
Select Prepare Individual Report, then Save or Print Report. Review the report before printing, saving, or sharing it.
Enlarge screenshot
You can turn on an Attendance Reminder. It is a local notification and depends on notification permission and device settings.
Store testing and other records
Testing
Open the Records tab and switch to Testing. The page differs by pathway. If testing is not required, it says so. When a record is required, work with one student at a time.
-
1
Enter the Assessment or Test Name and Completion Date. The upload buttons turn on once both are filled in.
-
2
Select Add Photo or Upload Result to store a photo, PDF, or image.
-
3
Choose Kept Outside This App when you retain the needed result elsewhere.
Records
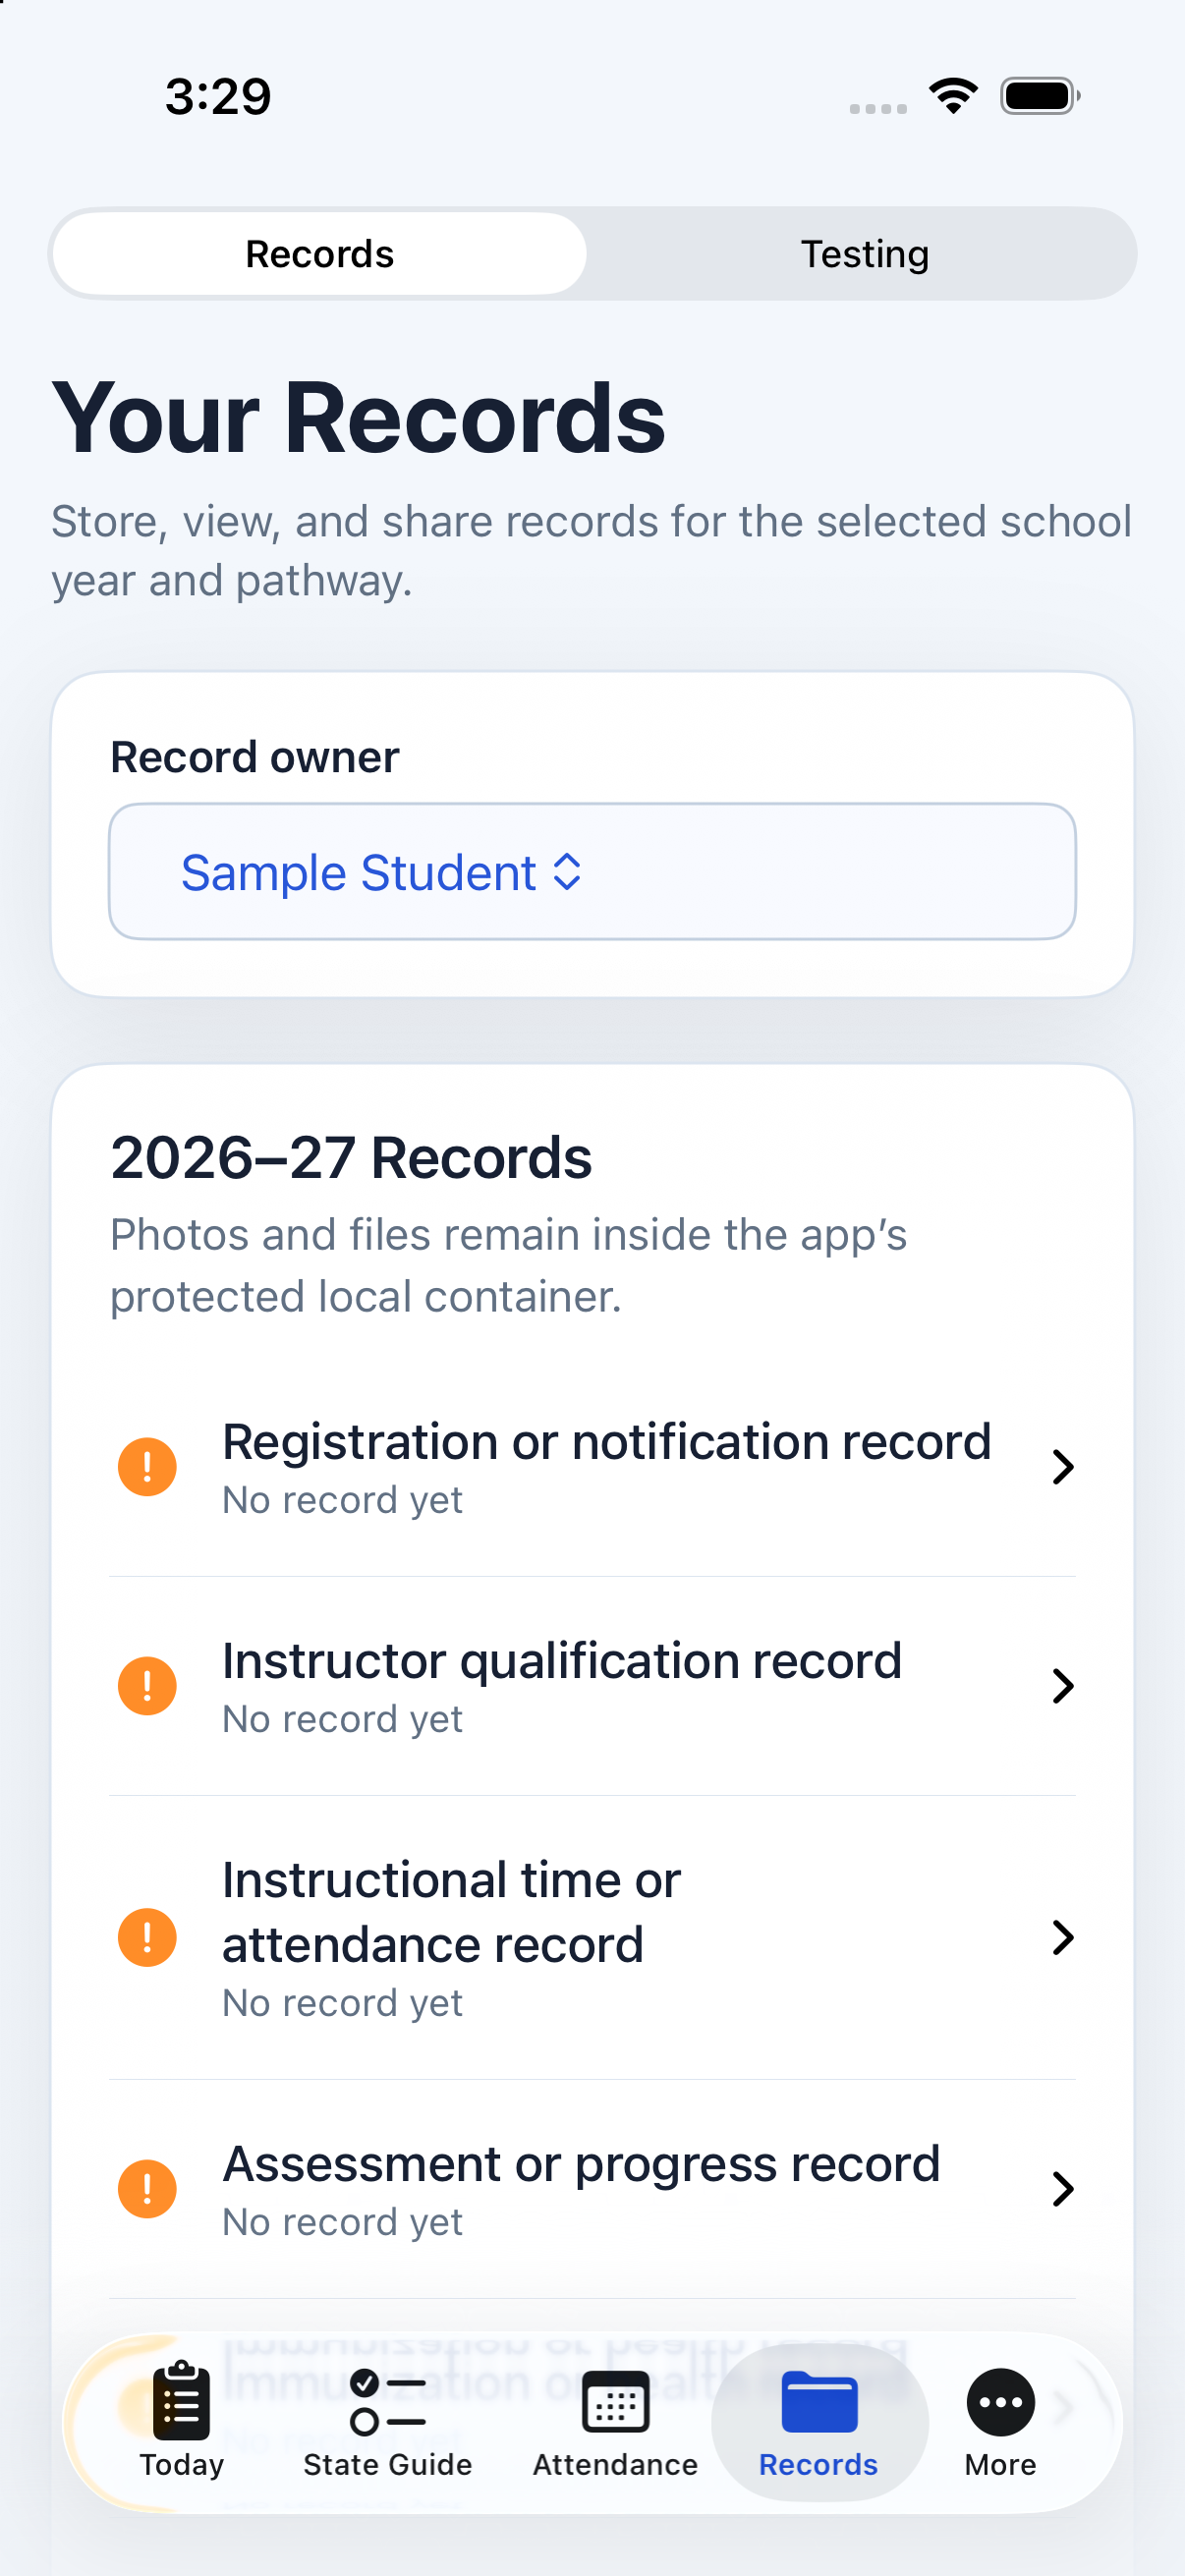
Open the Records tab and choose a Record owner: a student or School-wide record. Each record shows a symbol and its status in words, such as No record yet or 1 record saved. Select a record to see what it needs, then select Import Photo or File, or Scan Paper Record when available. Select a stored file to view or share it.
What “Kept Outside This App” means
It records your organization choice. It does not attach a file, verify the record, or confirm compliance. Use it only when you are retaining the needed record yourself.
Use Delete only when you want to permanently remove the app’s local copy from this iPhone. Some workflow records have their own pages: Open Homeschool Status, View or print individual attendance, and Open Testing.
Enlarge screenshot
Check which records you’ve saved
Open the Today tab to see the Records Checklist. It is read-only and counts what you entered elsewhere; it doesn’t confirm legal compliance. Tap the small label symbol on a row to see what that label means. Selecting an item takes you to the relevant page.
- Record saved for a record-based item means an accessible stored local file is available in the app or you saved an outside-app attestation.
- No record yet means the app does not yet have the needed information.
- If triggered means the item may apply only in certain circumstances.
- Marked not applicable reflects a saved not-applicable choice where available.
- Ongoing means the requirement needs continuing attention.
For recurring evidence, the stored file or outside-app attestation must be for the selected school year. A stored file for a one-time or non-recurring requirement may remain usable in later school years. A Kept Outside This App attestation is saved for one school year.
Needs Confirmation or Depends on Your Program may appear above the checklist when research does not settle whether a category applies. It is neither Record saved nor Marked not applicable. Check current official guidance.
These labels organize your work. They are not an approval from Synodos or a government authority.
Use Links carefully
More → Links separates Official State Actions, Official State Guidance, Official Source Information, and Helpful Resources. Helpful resources are optional and are not official state sources. Opening a link leaves the app; the app does not send your family records to the website you open.
Worked example: attendance update
This fictional example is for reading only. It does not ask you to add, change, or save information in the app.
- 1School-year dates are already set.
In this example, the fictional student’s dates include the current week. Weekdays in that range begin as assumed instruction days.
- 2One weekday is a saved day off.
The fictional student has one weekday marked Day Off, so that day is an exception to the assumed instruction days.
- 3The reports use different dates.
Actual through today counts only through its as-of date. Projected full school year also includes future assumed weekdays and the saved day off.
- 4The report is reviewed before sharing.
Before a fictional report is saved or shared, the family checks the student, dates, attendance basis, and day-off correction.
Subscription and Family Sharing
Setup is free. The full State Guide, reminders, and adding new records need a subscription: an annual subscription through Apple with a free trial for new subscribers. When you select something that needs a subscription, the app shows the price and the free trial before you subscribe.
- If your subscription ends, records you already saved stay viewable, printable, and exportable. State Guide details, reminders, and adding new records pause until you subscribe again.
- Manage or cancel anytime in your Apple Account settings, or from More → Settings → Subscription → Manage Subscription. Use Restore Purchases on a new iPhone.
- Family Sharing: one subscription covers everyone in your Apple Family Sharing group. The person who subscribed manages it.
Back up and restore your information
Open More → Settings and go to Encrypted Backup.
Apple device backup
The app’s local container is eligible for your normal iCloud device backup or encrypted computer backup when enabled in Apple device settings. Homeschool Assistant does not operate, receive, inspect, or restore Apple device backups.
Create an encrypted portable backup
-
1
Enter a Backup password with at least 12 characters, then enter it again in Confirm password.
-
2
Select Create Encrypted Backup.
-
3
Choose where to save the protected backup file in the iPhone sharing or Files flow. Keep the password separately from the file.
Restore a portable backup
Enter the backup password, select Restore Encrypted Backup, and choose the backup file. Review the warning. Select Replace and Restore only when you want to replace current family, student, attendance, stored records, and reminder data with the selected backup.
Using Homeschool Assistant on more than one iPhone
Your records are kept on the iPhone where you enter them. They aren’t stored online, so each iPhone has its own copy.
If two parents both use the app, most families choose one iPhone as the home for their records. That’s where attendance, test results, and documents get added. To give the other iPhone an up-to-date copy:
- 1On the main iPhone, create an encrypted backup (steps above).
- 2Send the backup file to the other parent, for example by AirDrop or Messages, and share the password separately.
- 3On the other iPhone, select Restore Encrypted Backup and enter the password.
Good to know: restoring replaces everything on the receiving iPhone with the backup, so anything added only on that phone will be replaced. Keep new entries on the main iPhone, and send a fresh backup whenever the other phone needs to catch up, such as before a portfolio review or evaluation.
Delete all app data
Delete All App Data, at the bottom of Settings, permanently removes the active family, students, attendance, stored records, and reminders from this iPhone. It does not remove Apple device backups or copies you previously printed, exported, shared, or saved elsewhere. The next time the app opens, it starts the first-run setup again.
Adjust the app and get help
In More → Settings, choose System, Light, or Dark appearance; choose a date display; and select US Letter or A4 as the default print paper. Text size and contrast follow your iPhone: open the iPhone Settings app, then Accessibility → Display & Text Size.
Contact support
The Support section of Settings includes Privacy Policy, Terms of Use, and Contact Support. Contact Support opens an email to homeschool-support@synodospath.com. The app does not automatically add family records to that email. Decide carefully what, if anything, you include.
Your records and privacy
Family information, attendance, testing results, documents, and reminders stay in the app’s protected local iPhone storage. The app has no Synodos account, Synodos-operated record server, CloudKit synchronization, advertising, analytics, or AI features.
When you import a photo or file, the app stores a local copy. The original remains where you kept it unless you delete it separately. When you print, export, save as PDF, share a record, or save an encrypted backup, the destination you choose may retain that copy under its own privacy practices.
A reminder did not arrive
Open the page where the reminder was created and check its frequency and date. Confirm notification permission and iPhone settings. Local reminders can be affected by device conditions and do not guarantee delivery.
An attendance report looks wrong
Check the student, report type, first and last instruction dates, date range, and saved exceptions or corrections. Actual is limited to its as-of date; Projected uses the full configured school year.
A file will not import
Try the iPhone Files or Photos picker again and confirm you have selected a supported PDF or image. If you keep the record elsewhere, choose Kept Outside This App instead. The app stores a local copy when an import succeeds.
A backup will not restore
Use the same backup password that was set when the file was created. Homeschool Assistant cannot recover a forgotten password. Review the warning before selecting Replace and Restore; restoring replaces current records.
Important limits
- The app does not submit forms, contact agencies, or complete official actions for you.
- It does not guarantee that requirements are complete, current, or sufficient for your situation.
- It does not replace a current official source, local authority guidance, legal counsel, medical advice, or your review before sharing.
- It does not create curriculum, lesson plans, grades, transcripts, test-provider recommendations, or score evaluations.
- Keep records and backups you need before deleting the app or changing devices.